
I still remember the first time I tried to cast off my knitting project – it was a disaster. I had spent hours, even days, working on it, and the thought of how to cast off knitting without ruining the entire thing was daunting. The common myth that casting off is a complicated, frustrating process had me intimidated, but I soon discovered that with a clear, step-by-step approach, it’s actually quite straightforward. In fact, learning how to cast off knitting can be a liberating experience, allowing you to finish your projects with confidence and precision.
As we dive into the world of casting off, I want to assure you that this article will provide you with honest, no-hype advice on how to master this essential knitting skill. You’ll learn how to cast off your stitches with ease, using a simple, foolproof method that ensures a professional finish. By the end of this guide, you’ll be able to cast off your knitting projects with confidence, knowing that you’ve completed them to the highest standard. So, let’s get started on this journey together, and I’ll show you that casting off is not only easy but also a satisfying way to complete your knitting projects.
Table of Contents
Guide Overview: What You'll Need

Total Time: 30 minutes to 1 hour
Estimated Cost: $0 – $10
Difficulty Level: Easy
Tools Required
- Knitting needles size dependent on project
Supplies & Materials
- Yarn same type used for project
- Scissors for cutting yarn
- Tapestry needle for weaving in ends
Step-by-Step Instructions
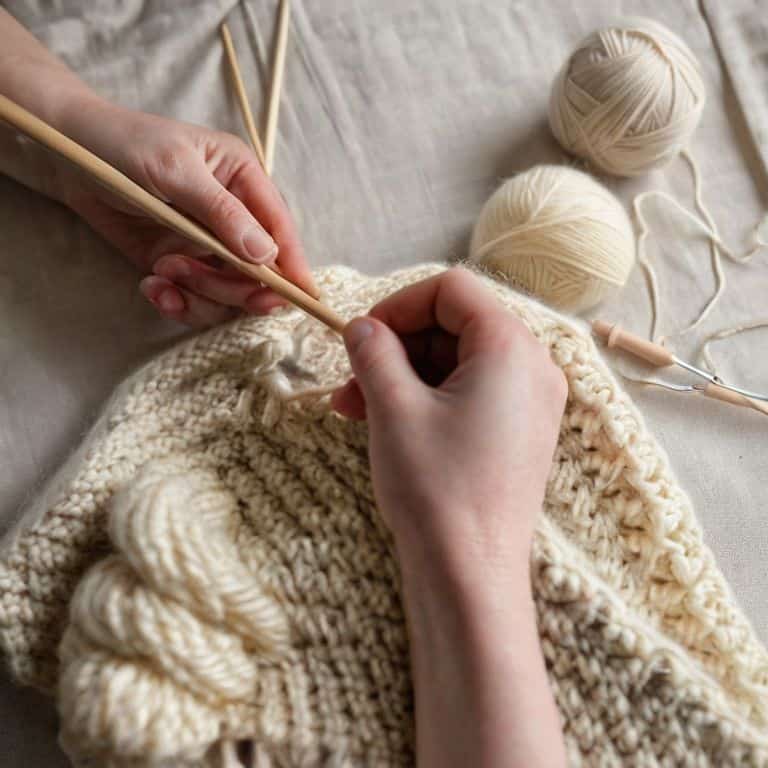
- 1. First, let’s prepare your knitting project for the casting off process by making sure you have a yarn needle and a pair of scissors within reach, as we’ll need these tools to weave in the ends once we’re done.
- 2. Next, take a moment to review your pattern to determine which type of cast-off method is recommended for your specific project; some patterns may call for a basic bind-off, while others may require a more specialized technique, such as a three-needle bind-off or a stretchy bind-off.
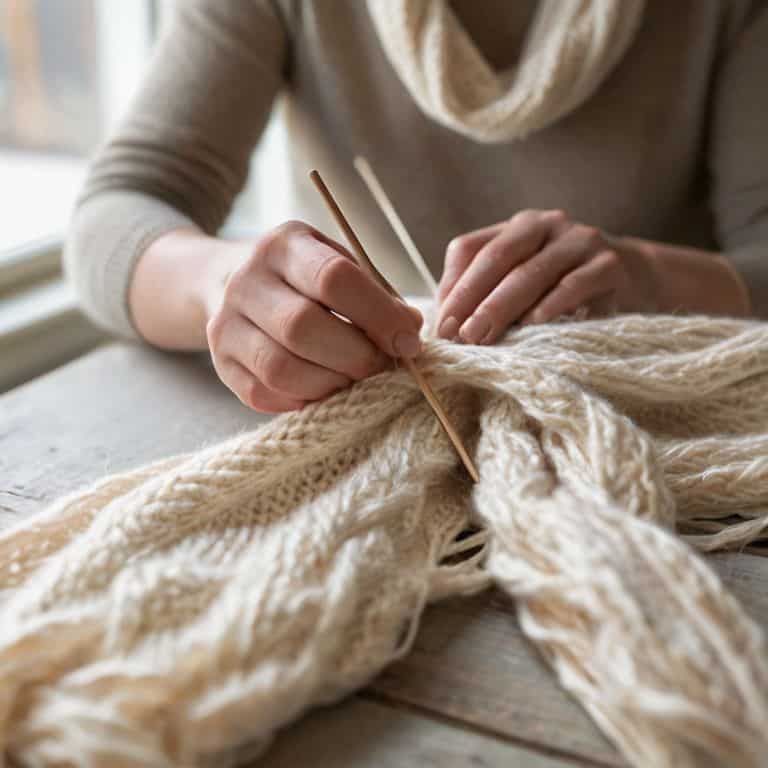
- 3. Now, let’s begin the casting off process by knitting the first stitch of the row; this will help you get started and ensure that your tension is even, which is crucial for a professional-looking finish.
- 4. Once you’ve knit the first stitch, you’ll need to pass the second stitch over the first stitch, which will start the process of securing your stitches; be sure to keep your yarn at a comfortable tension, as this will help prevent your project from becoming too tight or too loose.
- 5. Continue knitting and passing stitches over, one by one, until you’ve completed the row; as you work, take care to maintain a consistent tension and keep your stitches even, which will help you achieve a smooth, polished edge.
- 6. When you reach the end of the row, you’ll need to secure the last stitch by passing it over the second-to-last stitch; then, use your yarn needle to weave in the ends, making sure to keep your tail long enough to secure it properly.
- 7. Finally, take a step back and admire your handiwork; with your project cast off, you can now block it to even out the stitches and give it a professional finish, which will make all your hard work truly shine.
Mastering How to Cast Off Knitting
As you become more comfortable with the casting off process, you’ll want to explore different knitting bind off methods to find the one that works best for your projects. Some methods, like the long-tail bind off, are great for creating a stretchy edge, while others, like the three-needle bind off, are perfect for joining two pieces of knitting together. I recommend experimenting with different techniques to see what works best for you.
When it comes to finishing knitting projects, it’s all about paying attention to the details. Make sure to weave in those ends carefully, and consider using a stretchy cast on technique to match your bind off method. This will ensure that your project lies flat and looks professional. Remember, practice makes perfect, so don’t be discouraged if it takes a few tries to get the hang of it.
To take your knitting to the next level, I suggest checking out some knitting pattern tutorials online. These can provide valuable tips and tricks for avoiding common mistakes, such as uneven tension or loose stitches. By mastering the basics of casting off, you’ll be well on your way to creating beautiful, professional-looking knitting projects that you’ll be proud to show off. With patience and practice, you’ll become a pro at finishing your knitting projects in no time.
Common Mistakes to Avoid in Finishing Projects
As you practice casting off, keep an eye out for a few common pitfalls that can make your finished project look less polished. One of the most frequent mistakes is working too tightly, which can cause the edge to pucker. To avoid this, try to keep your tension even and not too tight, just as you would when knitting the body of your project.
Another mistake to watch out for is dropping stitches, which can leave unsightly holes in your finished work. To prevent this, make sure to count your stitches carefully as you cast off, and don’t pull the yarn too tightly, which can cause stitches to slip off the needle.
Knitting Bind Off Methods for Beginners
As we explore the world of knitting bind off methods, I want to reassure you that there are several techniques to choose from, each with its own unique characteristics. For beginners, I recommend starting with the basic bind off method, which involves knitting the first stitch and then passing the second stitch over the first. This method provides a clean and simple finish to your project.
Let’s take a closer look at a few popular bind off methods, including the long-tail bind off and the three-needle bind off. These methods offer a bit more flexibility and can be used to create a variety of edges, from stretchy to firm. Don’t worry if these terms seem unfamiliar – we’ll break each method down into easy-to-follow steps, and I’ll be here to guide you every stitch of the way.
Casting Off with Confidence: 5 Essential Tips
- Make sure to count your stitches before casting off, as this will help you ensure that you’re working with the correct number and won’t have to worry about running out of stitches mid-process
- Choose the right bind-off method for your project – there are several to pick from, and some work better with certain types of yarn or stitch patterns than others
- Keep your tension even and not too tight, as this can cause your cast-off edge to pucker or become misshapen
- Use a stretchy cast-off method, like the elastic bind-off, for projects that need to fit snugly, such as hats or sleeves
- Block your finished project after casting off to even out the stitches and give it a professional finish – this step can make all the difference in the final appearance of your knitting
Key Takeaways for a Smooth Finish
Always count your stitches before starting the cast-off process to ensure you have the correct number, making the process less frustrating and more enjoyable
Choose the right cast-off method for your project, considering factors like texture, elasticity, and visibility, to achieve a professional-looking finish
Practice casting off with scrap yarn before working on your actual project to build confidence and muscle memory, allowing you to focus on the joy of creating something beautiful
Casting Off with Confidence
The moment you cast off your knitting is like closing the cover on a good book – it’s a sense of accomplishment, but also a reminder that every ending marks a new beginning, waiting to be stitched into reality.
Beatrice "Bea" Quinn
Wrapping Up Your Knitting Journey
As we conclude our journey through the world of casting off knitting, let’s take a moment to review the key points we’ve covered. We started with the basics of casting off, moved on to mastering various knitting bind off methods, and even discussed common mistakes to avoid when finishing projects. By following these steps and practicing patience, you’ve taken the first steps towards becoming a confident knitter. Remember, the casting off process is just the beginning – it’s a crucial step that sets your stitches free and brings your project to life.
Now that you’ve got the skills and knowledge to cast off your knitting projects with ease, I want to leave you with a final thought: the joy of making is not just about the end result, but about the journey itself. As you continue to knit and create, don’t be afraid to experiment, try new things, and make mistakes – they’re all an essential part of the learning process. Happy knitting, and I look forward to guiding you through many more creative adventures!
Frequently Asked Questions
What happens if I accidentally drop a stitch while casting off, can I still fix it?
Don’t worry, friend, it’s an easy fix. If you drop a stitch while casting off, simply stop and work it back up to the needle using a crochet hook or your knitting needles. Gently pull the stitch back into place, then continue casting off as instructed. Your project will still turn out beautifully, and you’ll be relieved it was such a simple solution.
How do I choose the right cast-off method for my specific knitting project?
To choose the right cast-off method, consider your project’s type and the stitch pattern used. Think about the fabric’s drape and the edge finish you desire. Ask yourself: Do I want a stretchy bind-off for a sweater, or a more rigid one for a scarf? Match your project’s needs to the cast-off method’s characteristics, and you’ll find the perfect fit.
Can I use the same cast-off technique for both flat and circular knitting projects?
While some cast-off techniques can be used for both flat and circular projects, others are more suited to one or the other. For example, the basic bind-off method works well for flat knitting, but for circular projects, you might prefer a technique like the stretchy bind-off or the three-needle bind-off to maintain elasticity and a seamless finish.