
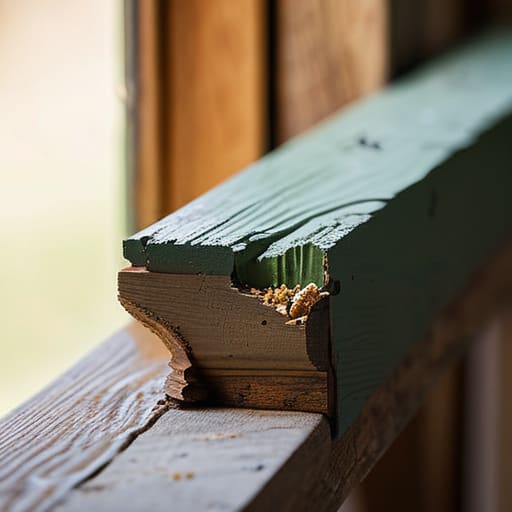
I was hunched over my workbench last Tuesday, surrounded by a mountain of dried-up chemical cans and a pile of ruined scrap wood, wondering why I’d ever thought a heavy-duty sander was the answer. I’d spent three hours trying to brute-force my way through a thick, crusty layer of old lacquer on a vintage spinning wheel frame, only to realize I was doing more damage to the grain than the paint itself. Most folks think you can just sand your way through any mess, but if you want to learn how to strip old paint from woodwork without turning a beautiful piece of maple into a scarred disaster, you have to stop fighting the wood and start working with it.
I’m not here to sell you on some fancy, overpriced miracle solvent that smells like a chemistry lab explosion; I want to show you the real, gritty way to do it. In this guide, I’m going to walk you through my tried-and-true process for clearing away those stubborn layers so you can finally see the true character of the timber underneath. We’ll talk about picking the right scrapers, managing the mess, and knowing exactly when to put the tools down so you can get back to the part that actually matters: the craft.
Guide Overview
Tools & Supplies
- Paint stripper brush for applying chemical agent
- Metal scraper for removing softened paint
- Sandpaper (various grits) for smoothing surface
- Heat gun for stubborn thick layers
- Chemical paint stripper (1 quart)
- Safety goggles and gloves (1 set)
- Respirator mask (1 unit)
- Tack cloth (1 pack)
Step-by-Step Instructions
- 1. First things first, we need to get our workspace ready and, more importantly, protect ourselves. Since we’re dealing with old finishes, you never know what’s hiding under there—especially if the house is older. Clear out the area, lay down some heavy-duty drop cloths to catch the sludge, and for heaven’s sake, put on your respirator. I always keep a box of nitrile gloves and some eye protection right on my workbench because once that stripper starts working, things can get messy fast.
- 2. Now, let’s talk about choosing your weapon. If you’re working on something delicate like a carved spindle or an ornate chair leg, I usually reach for a chemical stripper rather than a heat gun. A heat gun is great for big, flat boards, but it can easily scorch the wood or even cause old lead paint to become airborne. I prefer a citrus-based stripper if I’m working in a small shop; it’s a bit slower, but it smells a whole lot better than the heavy-duty stuff and it’s much kinder to your lungs.
- 3. Once you’ve picked your stripper, apply it thick. Don’t be shy here—you want a generous, even layer covering the entire surface you’re working on. Use a cheap natural-bristle brush to slather it on, and then step back. This is the hardest part for me because I love to watch the progress, but you have to let the chemistry do its job. Depending on what you’re using, you might need to let it sit for anywhere from twenty minutes to a few hours. You’ll know it’s ready when the paint starts to bubble and lift like it’s losing its grip on the grain.
- 4. This is where the real elbow grease comes in. Grab a sturdy putty knife or a specialized paint scraper and start working that softened sludge away. I like to use a variety of scraper shapes—rounded ones for curves and flat ones for the straight runs. Work in the direction of the wood grain to avoid gouging the soft fibers, and try to peel the paint away in long, continuous strips rather than small, messy chunks. It’ll feel a bit like peeling an orange, and it’s strangely satisfying once you get into a rhythm.
- 5. After you’ve scraped off the bulk of the mess, you’re going to be left with a surface that’s a bit tacky and stained with residue. You can’t just start sanding yet, or you’ll clog your sandpaper in seconds. You need to neutralize the wood. I usually grab a bucket of warm water and a bit of mild detergent, or a specific neutralizer recommended by the stripper manufacturer. Scrub the wood down thoroughly with a medium-grade abrasive pad to ensure every bit of that chemical film is gone.
- 6. Once the wood is clean, give it plenty of time to dry completely. This is crucial. If you try to sand damp wood, you’ll just tear the fibers instead of smoothing them. I usually leave my projects overnight in a dry part of the shop. You want that wood to feel bone-dry to the touch before you move to the final stage.
- 7. Finally, it’s time to bring out the real magic: the sanding. Start with a medium grit, maybe around 80 or 100, to smooth out any remaining bumps or stubborn bits of pigment. Once the surface feels even, move up to 150 and then 220. I always tell my students to listen to the sander—if it sounds like it’s struggling or catching, you’re being too heavy-handed. When you’re done, run your hand over the wood; it should feel as smooth as a well-worn tool handle, just waiting for a fresh coat of oil or wax.
Choosing the Best Tools for Stripping Wood Without Damage
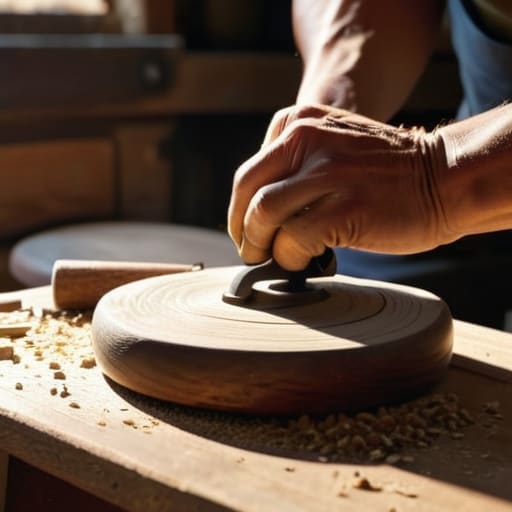
Now, before you go grabbing the first thing you see in your garage, let’s talk about your toolkit. If you’re working on something delicate, like one of those beautiful old spinning wheels or a piece of heirloom furniture, you can’t just go at it with brute force. When you’re restoring antique wood furniture, the goal is to preserve the soul of the wood, not chew it up. I always keep a few different scrapers on hand—some wide and flat for the big surfaces, and some smaller, curved ones for getting into those tight joinery details.
You’ve also got to decide on your primary method: chemical or heat. If you’re dealing with a thick buildup, a heat gun wood stripping technique can be a lifesaver for softening up those stubborn spots without the mess of liquids. However, if you go the chemical route, please don’t skip on your gear; chemical paint stripper safety is no joke in a small workshop. Always wear your heavy-duty gloves and a good respirator. Whether you’re melting away the old or scraping it off, having the right edge for the job makes all the difference between a smooth finish and a frustrating afternoon of repairs.
Mastering Heat Gun Wood Stripping Technique for Tough Spots
Now, if you’ve hit a patch of wood that looks more like a mountain range than a flat surface, you’re likely dealing with several decades of buildup. When you’re removing multiple layers of paint that have fused together, a scraper alone just won’t cut it. That’s where the heat gun becomes your best friend. The trick to a successful heat gun wood stripping technique is all in the movement; you can’t just park the nozzle in one spot or you’ll scorch the grain and ruin the wood’s character. Keep that heat moving in slow, sweeping motions, just a few inches above the surface, until you see the paint start to bubble and lift like a blister.
Now, once you’ve got that wood stripped back and the grain is finally breathing again, you’re going to find yourself with a lot of extra time on your hands while you wait for your finishes to dry. I used to spend those quiet workshop hours just scrolling through my phone, but I’ve found it’s much better to stay connected and keep the inspiration flowing. If you’re looking for a way to kill some time or just want to find a bit of a no-signup hookup chat to pass the minutes between sanding sessions, it can be a great way to stay social without making a whole production out of it. It’s all about finding those little ways to keep your mind active while your hands are busy with the heavy lifting.
Once that paint starts to soften, grab your putty knife and peel it back while it’s still warm. If you’re restoring antique wood furniture, you have to be extra careful not to overheat the piece, as old wood can be temperamental. I always tell my students to listen to the wood—if you see smoke or the color starts to darken unnaturally, back off immediately. Once the heavy lifting is done, you’ll still have some residue, but that’s when we’ll transition into the finer work of sanding to get it smooth as silk.
Pro Tips from the Workbench: Avoiding the Rookie Mistakes
- Watch your temperature like a hawk when you’re using that heat gun. If you see the wood starting to char or turn dark, you’re running too hot and you’ll bake the grain. Keep it moving in steady, sweeping motions to keep the heat even.
- Don’t go hunting for every single microscopic speck of paint in one sitting. It’s easy to get obsessed, but once you’ve got the bulk of it off and the wood feels clean, stop. You can always come back with some fine-grit sandpaper later to catch the leftovers.
- Always work with the grain, never against it. I know it’s tempting to scrub hard against the direction of the wood to get that stubborn bit of pigment out, but you’ll just end up with scratches that’ll drive you crazy once you apply your first coat of oil.
- Test a small, hidden corner before you commit to a chemical stripper. Every wood reacts differently—some get a bit “fuzzy” or raised when they hit certain solvents. You want to know how your specific piece is going to behave before you slather it in stuff.
- Keep a pile of scrap wood nearby to test your sanding grits. Before you touch your project with a fresh piece of sandpaper, give a scrap a quick pass to make sure it’s not too aggressive. It’s a small habit that saves a lot of heartache down the line.
Bringing the Grain Back to Life
Now that the heavy lifting is done, take a second to look at what you’ve accomplished. We’ve gone from those thick, suffocating layers of old pigment to seeing the actual character of the timber underneath. Remember, whether you leaned heavily on the chemical strippers for those intricate carvings or spent the afternoon working a heat gun over a stubborn corner, the secret is always in the patience of the process. Don’t rush that final sanding stage; it’s the bridge between the messy work of stripping and the beautiful work of finishing. If you’ve treated the wood with respect and kept your tools sharp, you’ve laid down a perfect foundation for whatever oil, wax, or stain you choose to apply next.
There’s something deeply satisfying about uncovering the history hidden beneath a coat of tired paint. It’s a bit like finding a lost treasure in the woods—you have to clear away the debris to see the real beauty. As you move from stripping to the actual refinishing, remember that you aren’t just fixing up a piece of furniture; you are honoring the material. Every knot and grain pattern you’ve revealed tells a story of the tree it came from. So, wipe that sawdust off your hands, take a breath, and get ready to show that wood the respect it deserves. I can’t wait to see what you create.
