I still remember the first time I tried to mend a knitted garment – it was a favorite sweater with a pesky hole, and I was determined to give it a new lease on life. As I delved into the world of how to mend your knitted garments, I discovered that it’s not just about fixing holes, but about preserving the memories and stories woven into every stitch. I’ve met countless makers who’ve shared their own tales of mending and repair, and I’ve learned that it’s a process that requires patience, love, and a willingness to learn.
As we explore the art of mending together, I promise to share practical tips and tricks that will help you rescue your beloved knitted items from the brink of disaster. In this article, we’ll dive into the nitty-gritty of how to mend your knitted garments, from identifying the type of yarn and fabric to using the right tools and techniques. Whether you’re a seasoned crafter or a beginner, I’ll guide you through the process with honest, no-hype advice that will help you restore your knitted treasures to their former glory. So, let’s get started on this journey of mending and discovery, and uncover the stories that make our handmade items truly special.
Table of Contents
Guide Overview: What You'll Need
Total Time: 1 hour 15 minutes
Estimated Cost: $5 – $15
Difficulty Level: Easy
Tools Required
- Tapestry Needle (for weaving in ends)
- Scissors (sharp, dedicated to cutting yarn)
- Yarn Needle (for sewing seams)
- Measuring Tape (for measuring fabric, 6 inches long)
Supplies & Materials
- Yarn (matching the original yarn as closely as possible)
- Darning Needle (for darning small holes)
- Fabric Glue (optional, for temporary repairs)
- Knitting Buttons (if replacing buttons, 1 inch in diameter)
Step-by-Step Instructions
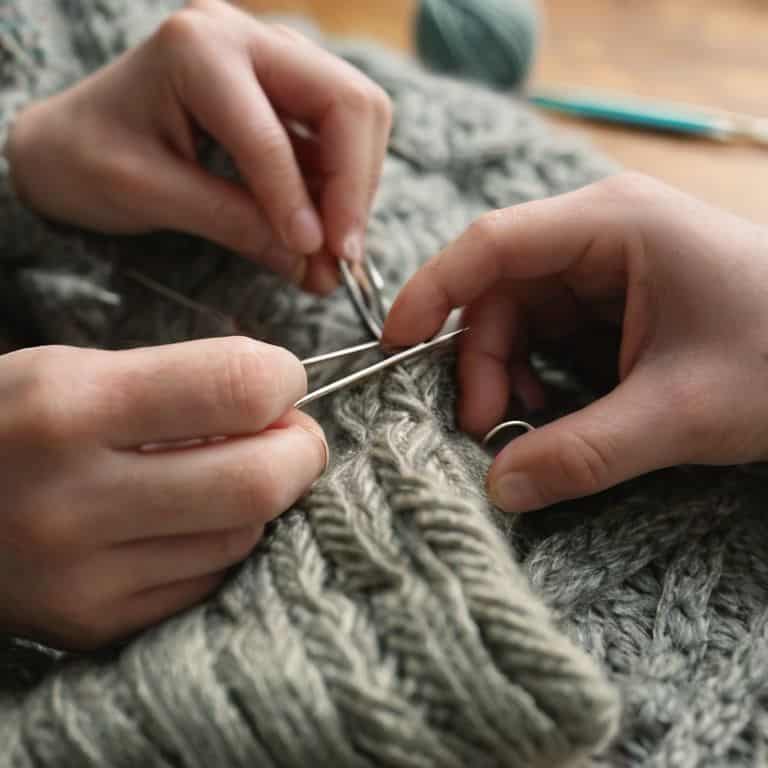
- 1. First, gather your tools, because, just like any good story, mending your knitted garments starts with the right characters – in this case, a yarn needle, some matching yarn, a pair of scissors, and the garment itself. It’s also a good idea to have a tapestry needle and a darning needle on hand for those especially tricky repairs.
- 2. Next, examine the damage closely. Take a moment to understand the type of mend you’re dealing with. Is it a small hole, a dropped stitch, or perhaps a seam that’s come undone? Knowing what you’re up against will help you plan your approach and ensure that your mend is as seamless as possible.
- 3. Now, thread your yarn needle with the matching yarn. This is where the story of your mend really begins. Make sure the yarn is long enough to complete the repair without having to rethread the needle multiple times, but not so long that it gets in the way. I like to think of this step as setting the stage for the narrative of my repair.
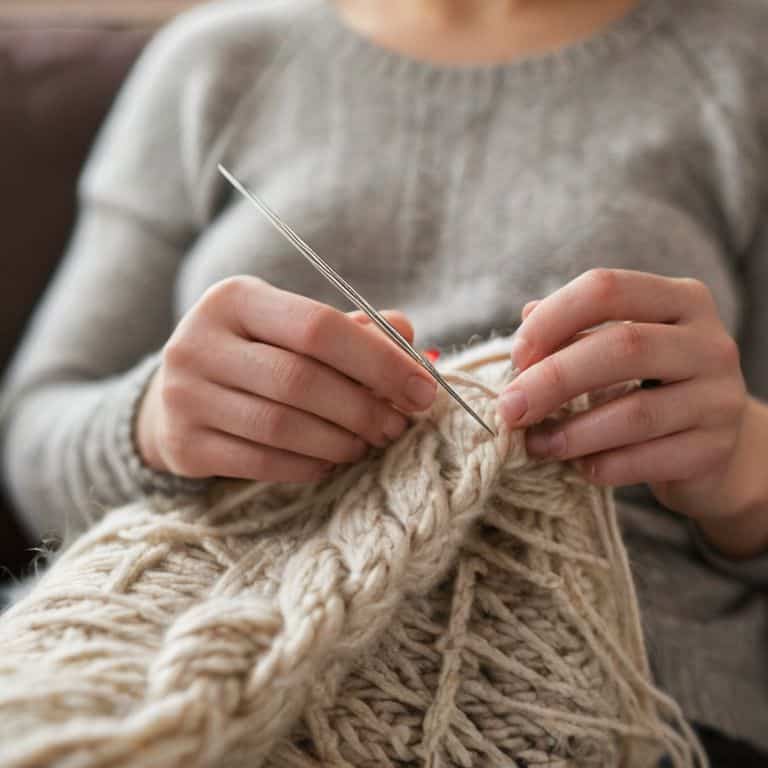
- 4. For small holes, start by weaving in and out of the stitches around the hole with your yarn needle. This helps secure the area and prevents the hole from getting any larger. It’s a bit like introducing the main character of your story – you want to make sure they have a solid foundation to stand on.
- 5. If you’re dealing with a dropped stitch, you’ll need to pick up the stitch and work it back into the fabric of your garment. This can be a bit tricky, but essentially, you’re re-writing the story of your knit by reworking the stitches to match the original pattern. Be patient, as this can take some time and careful attention.
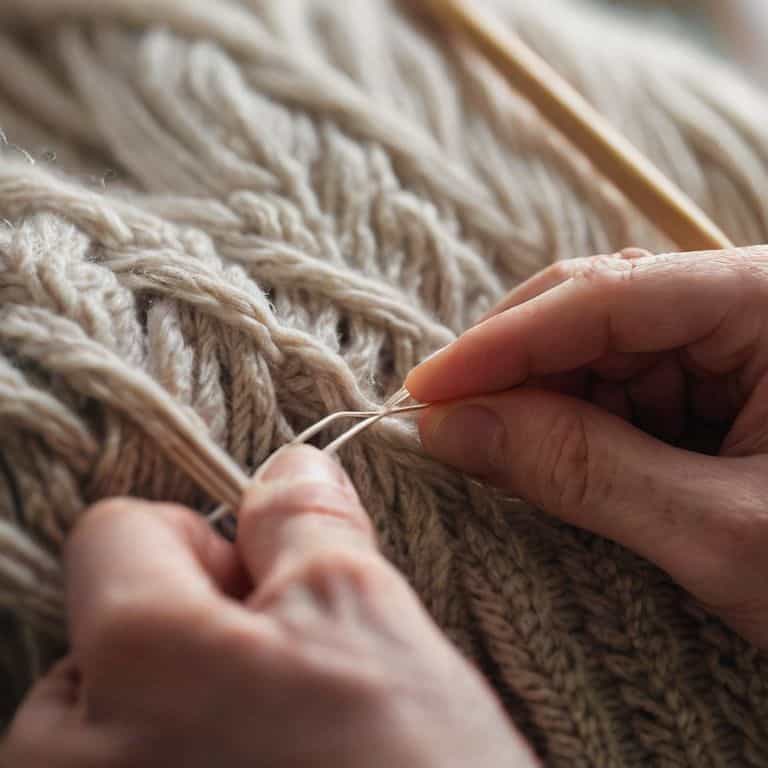
- 6. For larger repairs, such as a torn seam, you may need to use a darning technique. This involves weaving yarn in a pattern that mimics the original knit to reinforce the area. It’s a bit like adding a new chapter to your story – you want it to fit in seamlessly with what’s already there, but also add something new and interesting.
- 7. Once you’ve completed the mend, tie off the yarn securely and weave in the ends. This is the final page of your repair story, where everything comes together. Make sure the yarn is tied off tightly to prevent the mend from coming undone, and then weave in the ends to leave your garment looking as good as new.
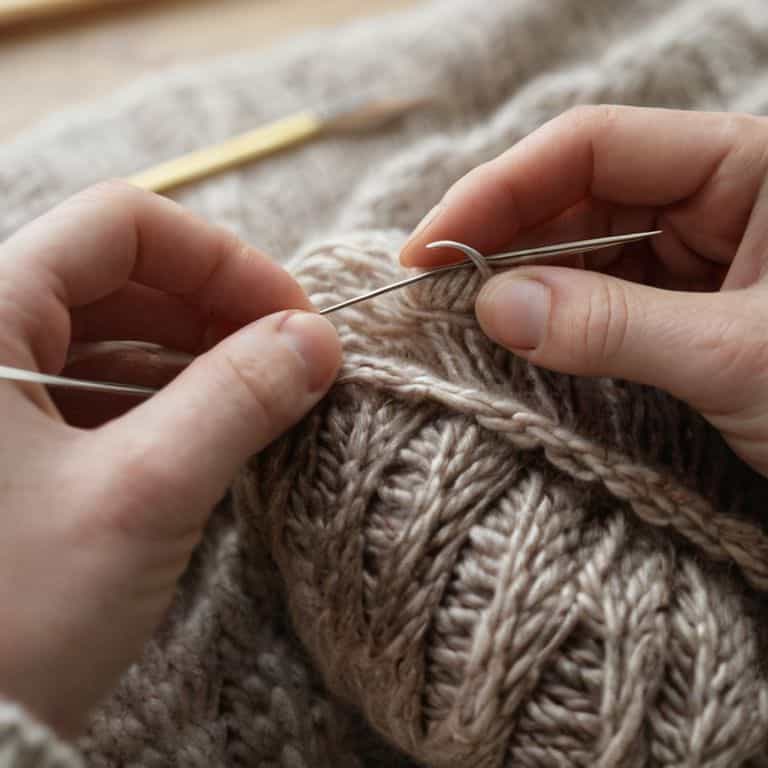
- 8. Finally, block the garment if necessary. Sometimes, after a repair, the area around the mend can become a bit distorted. Blocking the garment can help even out the stitches and restore its original shape, much like how editing a story can help refine the narrative and make it shine.
Mending Memories
As I sit here with my latest mending project, I’m reminded that every stitch tells a story. The process of repairing our knitted garments is not just about fixing holes, but about preserving the memories and emotions attached to each item. I think back to the fiber festival where I bought the yarn for this particular sweater, and the friend who taught me the pattern. Invisible weaving methods can be a game-changer in maintaining the integrity of these memories, allowing us to enjoy our favorite pieces for years to come.
When it comes to selecting the right yarn for mending, I’ve learned that yarn selection for mending is an art in itself. It’s not just about matching the color, but also the texture and weight of the original yarn. I’ve had my fair share of trial and error, but the end result is always worth it. By choosing the right yarn, we can ensure that our repairs are not only functional but also virtually undetectable.
As someone who’s passionate about sustainable fashion mending, I believe that taking care of our knitted garments is not just a practical skill, but also a way to reduce our environmental footprint. By learning to mend and maintain our knitwear, we can extend the life of our favorite pieces and reduce the need for frequent replacements. Whether you’re a seasoned knitter or just starting out, I encourage you to explore the world of hand knitting restoration tips and discover the joy of giving new life to your beloved garments.
Sustainable Knitwear Care Tips
As I’ve traveled to fiber festivals and met incredible makers, I’ve learned that sustainable knitwear care is just as important as the act of mending itself. It’s about treating our handmade garments with love and respect, so they can continue to tell their stories for years to come. I’ve picked up some valuable tips from indie dyers and designers on how to care for our knits, from gentle hand-washing to storing them in breathable bags.
By adopting these simple habits, we can reduce waste and extend the life of our beloved garments. It’s a mindset shift, really – one that values the time, effort, and love that goes into creating each piece. As someone who’s still learning to spin yarn (with limited success, I might add!), I appreciate the beauty of slowing down and caring for our knits in a way that honors their story.
Yarn Selection for Invisible Repairs
When it comes to selecting the right yarn for invisible repairs, I always think back to my conversations with indie dyers at festivals like Rhinebeck. They’ve taught me that the key is to find a yarn that not only matches the color, but also the texture and weight of the original. I’ve seen makers meticulously match yarns to repair a beloved blanket, and it’s truly an art form. By choosing the right yarn, you’re not only extending the life of your garment, but also preserving the memories and stories it holds.
I’ve learned that even the subtlest differences in yarn can make a repair stand out, so it’s worth taking the time to find the perfect match. Whether you’re searching through your stash or visiting a local yarn store, remember that every skein has a story to tell – and by choosing the right one, you’re becoming a part of that story.
Weaving Wisdom: 5 Essential Tips for Mending Your Knitted Garments
- Choose the right yarn: Select a yarn that matches the original as closely as possible to ensure a seamless repair
- Swatch before you stitch: Test your yarn and needles on a small swatch to guarantee the right tension and texture
- Know your stitches: Familiarize yourself with the original pattern’s stitches to replicate them accurately in your repair
- Work in good light: Adequate lighting can make all the difference in spotting even the tiniest of holes or dropped stitches
- Take your time: Mending is a process that requires patience, so don’t rush it – every careful stitch will show in the final result
Key Takeaways for Mending Your Knitted Garments
Mending your knitted garments is not just about fixing holes, but also about preserving the memories and stories behind each stitch
Choosing the right yarn for invisible repairs is crucial, and considering sustainable knitwear care tips can extend the life of your favorite pieces
By embracing the art of mending, you’re not only giving your garments a new lease on life, but also becoming a part of the larger narrative of the fiber arts community
The Heart of Mending
Mending your knitted garments is not just about fixing holes, it’s about weaving back in the memories and love that went into creating them in the first place.
Noah Byrne
Weaving a New Chapter
As we’ve explored the world of mending our knitted garments, we’ve covered the essential steps to revive our favorite pieces, from basic repairs to sustainable knitwear care tips. We’ve also delved into the importance of yarn selection for invisible repairs, ensuring that our mended items look as good as new. By embracing the art of mending, we not only extend the life of our garments but also preserve the memories and stories woven into every stitch.
As we put down our needles and yarn, remember that mending is not just about fixing holes – it’s about honoring the craft and the people who make it special. By sharing our passion for knitting and mending, we weave a sense of community that transcends threads and yarns, connecting us all in a beautiful tapestry of stories, love, and dedication.
Frequently Asked Questions
What if I don't have the original yarn used in the garment, how can I find a matching replacement?
If you don’t have the original yarn, don’t worry! I’ve been in that spot too. You can try searching online for yarn with similar fiber content, weight, and color. Alternatively, visit a local yarn store and ask for help finding a match. I’ve even had success with indie dyers creating custom matches – it’s all about finding the right story to continue your garment’s tale.
Can I use a different type of needle or thread for mending, or are there specific ones recommended for knitting repairs?
When it comes to mending, I’ve found that using a tapestry needle or a blunt-tipped yarn needle is best, as they won’t split the yarn. For thread, a matching yarn or a neutral-colored cotton thread works well. I’ve also had great results with silk or wool threads for a more invisible repair.
How do I prevent further damage or holes from forming in the same area after I've mended my knitted garment?
To prevent further damage, I always ask my guests on the podcast about their favorite reinforcement techniques. One tip that stands out is to add a subtle layer of fabric interfacing or a strip of woven ribbon to the mended area for extra stability, giving your favorite sweater a little extra love to keep it going strong.